
TM 5-3895-359-14&P
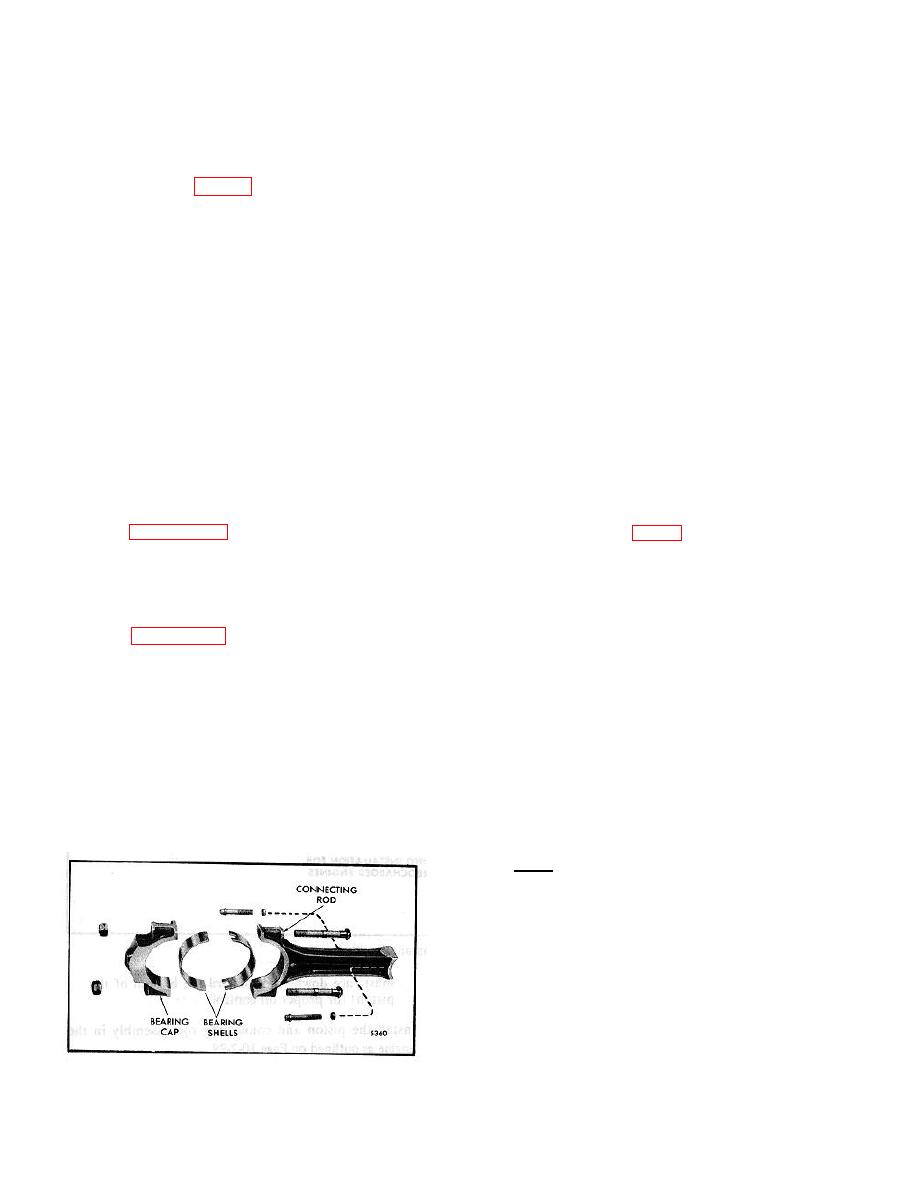
CONNECTING ROD
Cross-Head Type Piston
The connecting rod (Fig. 1) is forged to an "I" section
NOTE: Never use crocus cloth on the bearing
with an open or saddle type contour at the upper end
side of the pin.
and a bearing cap at the lower end. The bearing cap
and connecting rod are forged in one piece and bored
Connecting rods being removed from an original build
prior to separation.
engine can be reused as is, after considering the
following:
The upper end of the connecting rod is machined to
1. Check for visual damage (bent).
match the contour of the piston pin. The piston pin is
2. A previous bearing(s) or related failure.
secured to the connecting rod with two self-locking bolts
3. Is the connecting rod blue at the top or bottom end?
and spacers. The bearing cap is secured to the
4. Fretting at split line between the connecting rod and
connecting rod by two specially machined bolts and
cap.
nuts.
5. Excessive pound-in of the bolt head or nut.
Lubricating oil is forced through a drilled oil passage in
If the connecting rod has been subjected to any of the
the connecting rod to the piston pin and bushing.
above, it should be scrapped.
A service connecting rod includes the bearing cap and
In qualifying a used connecting rod from a source other
the attaching bolts and nuts.
than an original build engine, the following checks
should be made in addition to the above.
The replaceable connecting rod bearing shells are
covered on Page 10-2-90.
1. Check for cracks (Fig. 2) by the magnetic particle
method outlined on Page 10-2.49 under Crankshaft
Disassemble Connecting Rod from Piston
Inspection.
With the rod and piston assembly removed from the
2. Determine bore diameter of the rod, using a dial bore
engine, disassemble the piston and connecting rod as
gage and master ring as follows (Fig. 3).
outlined on Page 10-2-79.
a. Install the connecting rod cap on the connecting rod
Inspection
and tighten the bolt nuts to 60-70 lb ft (81-95 N )
m
torque.
Clean the connecting rod and piston pin with a
suitable solvent and dry them with compressed air.
Blow compressed air through the oil passage in the
rod bolt nuts. Over torque may permanently
connecting rod to be sure it is clear of obstructions. Use
distort the connecting rod cap.
crocus cloth, wet with fuel oil, to remove any trace of
fretting and/or corrosion on the connecting rod saddle
b. Measure diameter A and B as shown in Fig. 3.
and piston pin contact surface with the rod before
reassembly.
c. Obtain average of A and B to obtain size at split line.
A+B
=
X
which is the average of A + B
2
d. Measure C. The difference in the results of the
measurements X and C gives bore out-of-round and can
be .005 " maximum.
e. Add C with X and average to obtain average bore
size.
Fig. 1. Connecting Rod Details.
10-2-86
