TM 5-3895-342-12
c. Cleaning and Inspection.
(3) Disconnect the fuel line at the carburetor.
(1) Clean all parts with a cleaning solvent.
(4) Disconnect the air hose at the carburetor.
(2) Inspect all parts for defects and damage.
(5) Remove the cap screws and lockwashers
Replace defective or damaged parts.
securing the carburetor to the upper
d. Re-assembly. Install the inner oil cup,
manifold and remove the carburetor.
outer oil cup and the clamp on the air cleaner
body (fig. 4-24).
e. Installation. Install air cleaner in reverse of
instructions on figure 4-23.
4-29. Fuel Strainer
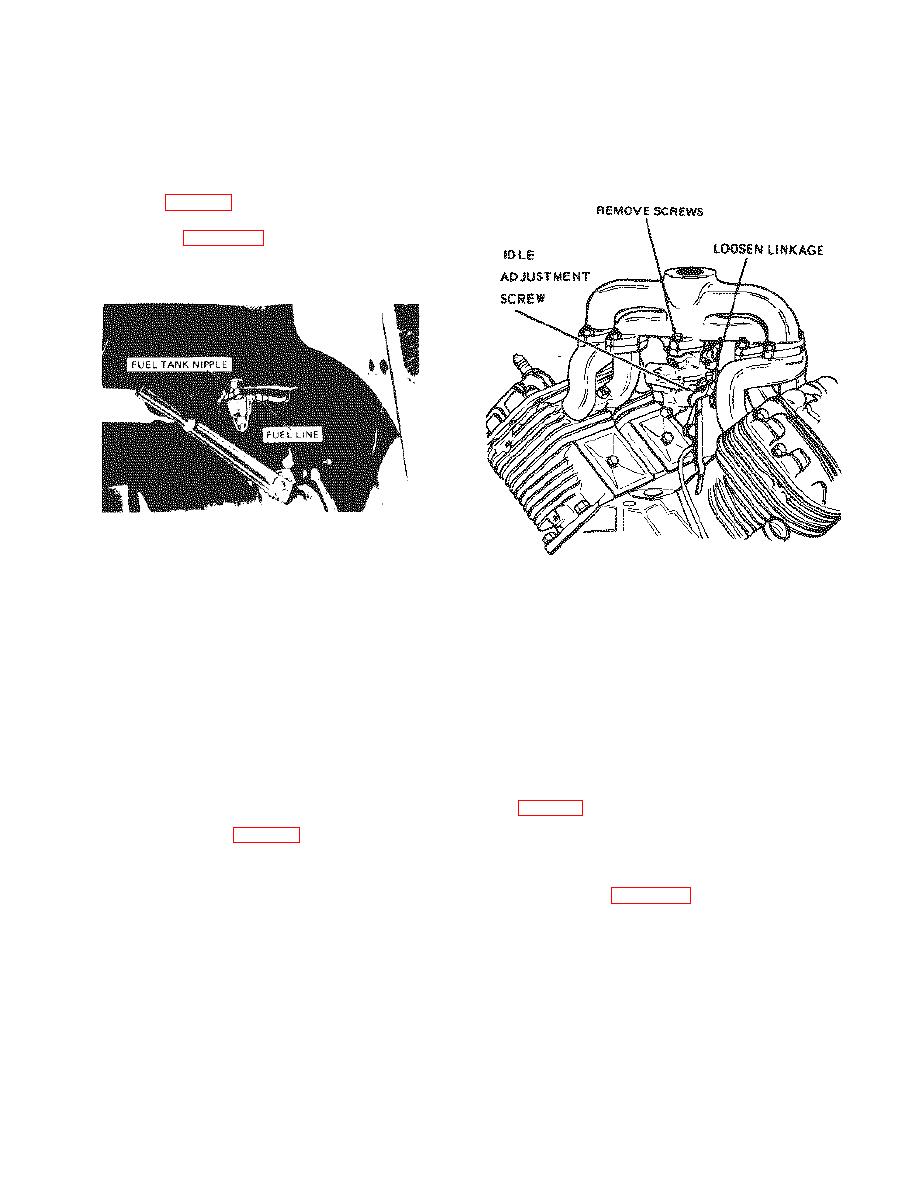
a. Removal. Remove the fuel strainer as
instructed on figure 4-25.
1. DRAIN FUEL FROM FUEL TANK
2. DISCONNECT FUEL LINE.
3. UNSCREW FUEL STRAINER FROM FUEL
Figure 4-26. Carburetor removal.
TANK NIPPLE
b. Cleaning and Inspection.
(1) Clean the carburetor with cleaning solvent
ME 3895 342-12 4-25 C1
and dry thoroughly with a lint-free cloth.
Figure 4-25. Fuel strainer removal.
(2) Inspect the carburetor for damage, loose
b. Cleaning and Inspection
screws, wear in the throttle valve shaft,
(1) Clean the fuel strainer with a cleaning
and other defects. Replace a defective
solvent.
carburetor.
(2) Inspect the fuel strainer for defects or
c. Installation. Install the carburetor in reverse
damage.
Replace a defective or
of instructions in a above.
damaged fuel strainer.
d. Adjustments.
c. Installation. Install the fuel strainer in
(1) Start the engine and allow it to reach operating
reverse of instructions on figure 4-25.
temperature.
4-30. Carburetor
(2) With the carburetor throttle closed, turn the idling
a. Removal.
screw (fig. 4-26) to the left until the engine starts to
(1) Disconnect the choke control wire at the
fail, then turn the screw to the right until the engine
carburetor (fig. 4-26).
runs smoothly.
(2) Disconnect the governor adjusting rod at
4-31. Fuel Level Sending Unit
the carburetor.
a. Removal. Remove the fuel level sending
unit as instructed on figure 4-27.
Change 1
4-17


