TM 5-3895-359-14&P
5. Remove all of the accessories and assemblies with
18. Remove the thrust washers from each side of the
their attaching parts as necessary to permit the engine
rear main bearing.
to be mounted on an overhaul stand.
19. Remove the pistons, connecting rods and liners.
6. Mount the engine on an overhaul stand and fasten it
securely to the mounting plate.
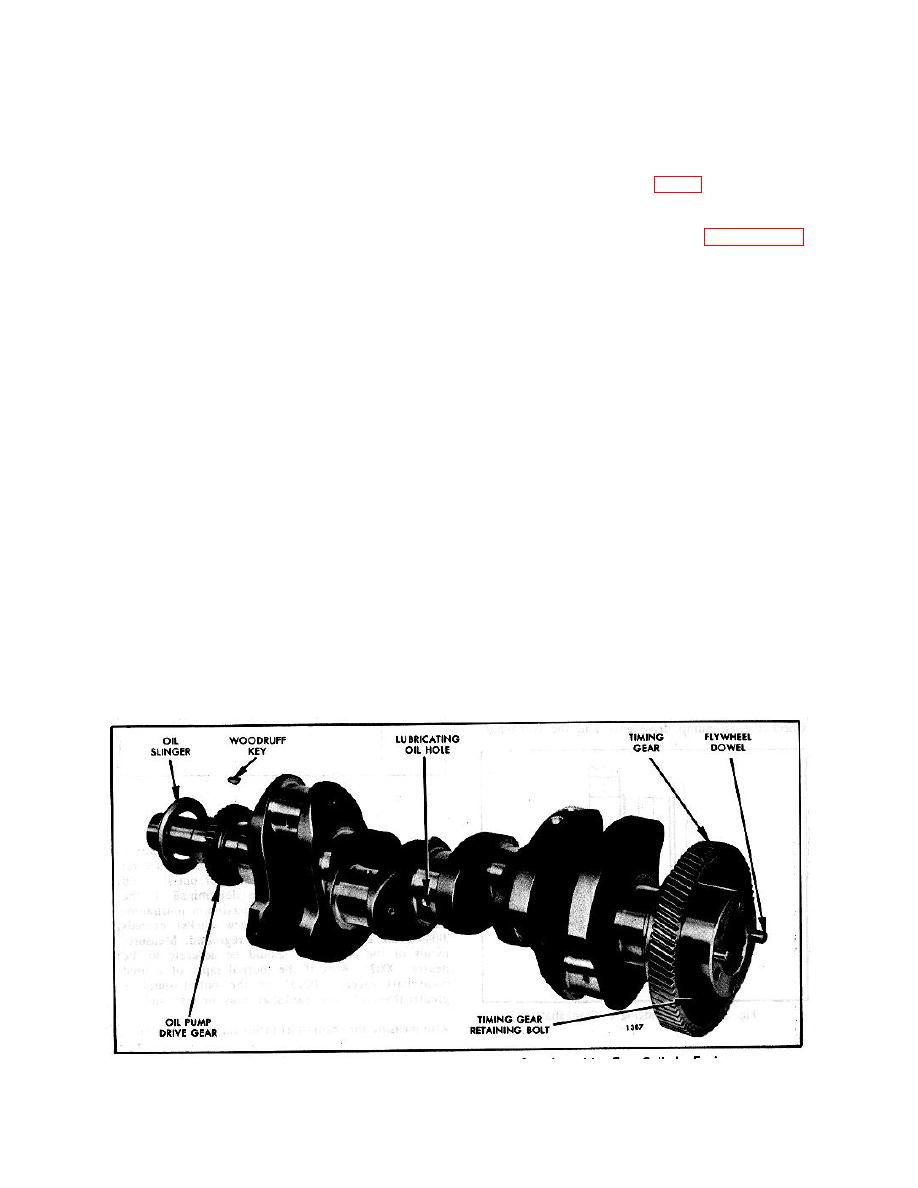
20. Remove the crankshaft, including the timing gear
and oil pump drive gear (Fig. 2).
WARNING
21.
Refer to Page 10-2.123 for removal of the
Be absolutely sure the engine is
crankshaft timing gear and Page 10-5-9 for the
securely attached to the stand before
procedure covering removal of the oil pump drive gear.
releasing the lifting sling. Severe
injury to personnel and destruction
Inspection
of engine parts will result if the
engine breaks away from the stand.
After the crankshaft has been removed, clean and
inspect it thoroughly before reinstalling it in the engine.
7. Remove the oil pan.
Remove the plugs and clean out the oil passages
8. Remove the lubricating oil pump.
thoroughly with a stiff wire brush. Clean the crankshaft
with fuel oil and dry it with compressed air. Then
9. Remove the flywheel and flywheel housing.
reinstall the plugs.
10. Remove the crankshaft pulley.
Inspect the keyways for evidence of cracks or wear.
Replace the crankshaft, if necessary.
11. Remove the vibration damper.
If the crankshaft shows evidence of excessive
12. Remove the front engine support.
overheating, replace the crankshaft since the heat
treatment has probably been destroyed.
13. Remove the crankshaft front cover.
Used crankshafts will sometimes show a certain amount
14. Remove the vibration damper inner cone or oil seal
of ridging caused by the groove in the upper
spacer.
15. Remove the cylinder head.
16. Remove the connecting rod bearing caps.
17. Remove the main bearing caps.
Fig. 2. Typical Crankshaft, Timing Gear and Oil Pump Drive Gear Assembly-Four Cylinder Engine
10-2-49


