
5-84. VALVE BANK ASSEMBLY REPAIR.
This task covers:
b. Cleaning/Inspection
c. Assembly
a. Disassembly
INITIAL SETUP
Tools
Materials/Parts
Tool kit, general mechanic's: equipment
Lockwasher (3)
maintenance and repair
Preformed packings (4)
Seals (7)
Tool outfit, hydraulic system: test and repair, 3/4
Fluid, hydraulic (item 23, appendix E)
ton, trailer mounted
Solvent, drycleaning (item 54, appendix E)
Wrench, torque
Equipment Condition
TM or Para
Condition Description
Valve bank assembly
removed.
a.
Disassembly.
NOTE
Remove and repair one spool assembly at a
time to ensure that spools do not become
mismatched to an incorrect bore.
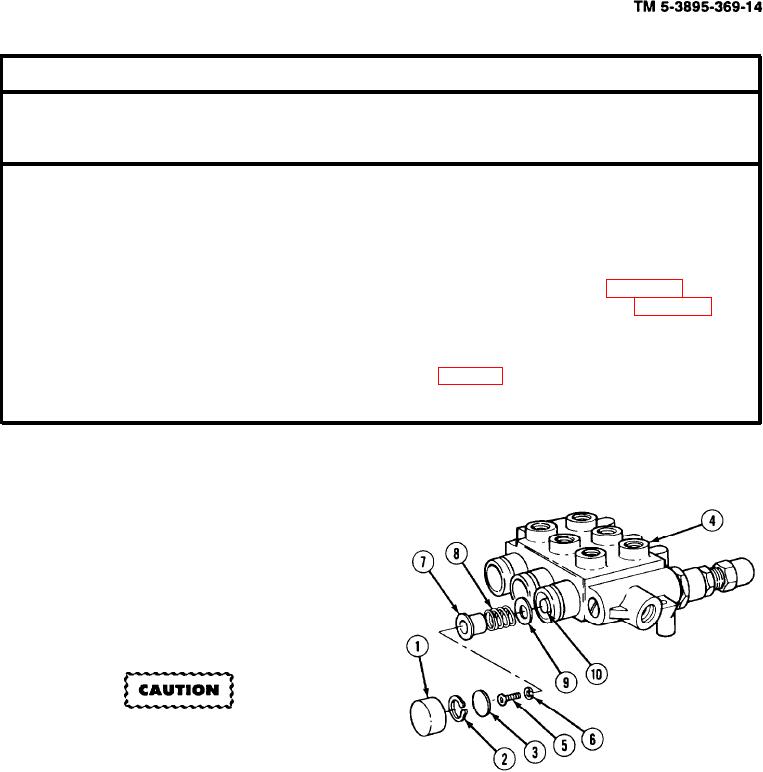
(1) Remove rubber boot (1).
(2) Remove snap ring (2) and stop disc (3) from
valve body (4).
When removing spool assemblies, be
careful not to scratch or damage the spool
or the bore. If damaged, the entire valve
assembly must be replaced.
(3) Remove spring assembly screw (5), lockwasher (6), stop collar (7), centering spring (8), and stop
washer (9) from spool (10). Discard lockwasher.
5-497