TM 5-3895-359-14&P
Inspection
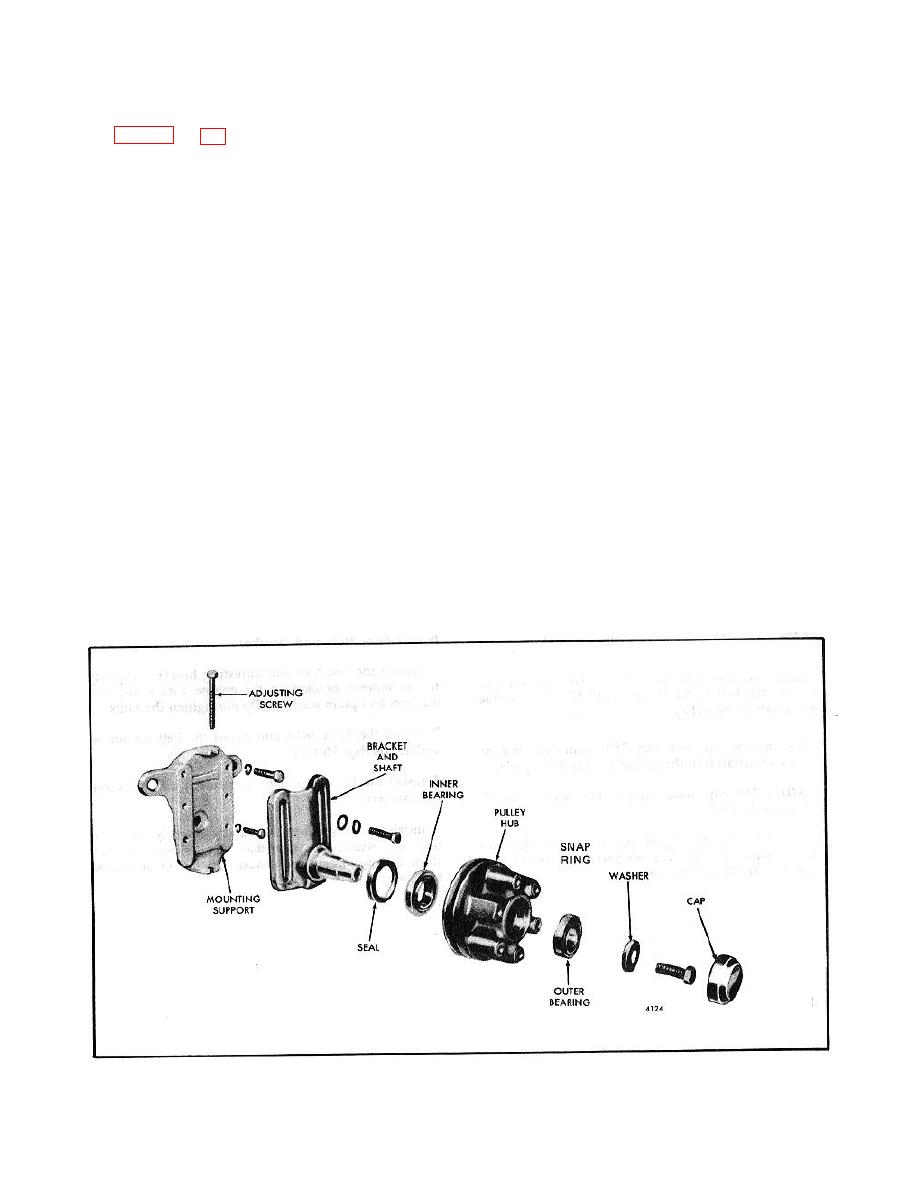
Disassemble Fan, Hub and Bracket
Clean the fan and related parts with fuel oil and dry
them with compressed air. Shielded bearings must not
and adjusting bracket as follows:
be washed, dirt may be washed in and the cleaning fluid
could not be entirely removed from the bearing.
1. Remove the fan attaching bolts and lock washers
Examine the bearings for any indication of corrosion or
and detach the fan.
pitting. Hold the inner race or cone and revolve the
outer race or cup slowly by hand. If rough spots are
2. Remove the fan hub cap.
found, replace the bearings.
3. Remove the hub bolt and washer.
Check the fan blades for cracks. Replace the fan if the
blades are badly bent, since straightening may weaken
4. Withdraw the hub and bearing assembly from the
the blades, particularly in the hub area.
shaft. It may be necessary to tap the end of the shaft
with a soft hammer to loosen the hub assembly.
Remove any rust or rough spots in the grooves of the
fan pulley and crankshaft pulley. If the grooves are
5. Remove the bearings and oil sea) as follows:
damaged or severely worn, replace the pulleys.
a. Remove the snap ring from the grove in the
The fan shaft rear bearing inner race should be
outer (front) of the hub.
inspected for any measurable wear. Replace the inner
b. Remove the ball bearing by tapping alternately
race if the outer diameter is less than 1.7299".
around the oil seal from the hub. Discard the oil
seal. outer edge of the bearing with a small
NOTE:
brass rod and hammer.
The inner and outer races are only
c. Reverse the pulley hub and remove the dust
serviced as a rear roller bearing
cap.
assembly.
d. Remove the inner (rear) roller in the same
manner as outlined in Step b.
When installing the rear bearing inner race, press it on
the shaft and position it 1.35 " to 1.37" from the end of
the shaft.
Fig. 2 - Shaft Type Fan Hub Assembly Details for Compact Front End Engine.
10-6-17


