
TM 5-3895-359-14&P
foaming. The process must be carefully watched and,
compressed air.
Replace the oil cooler core if leaks
when bubbling stops (this usually takes from 30 to 60
were indicated.
seconds), the core should be removed from the cleaning
solution and thoroughly flushed with clean hot water.
After cleaning, dip the core in light oil.
NOTE:
Do not attempt to clean an oil cooler core when an
engine failure occurs in which metal particles from
worn or broken parts are released into the
lubricating oil. In this instance, replacement of the
oil cooler core is strongly recommended.
Pressure Check Oil Cooler Core
1.
Make a suitable plate and attach it to the
flanged side of the oil cooler core. Use a gasket made
from rubber to ensure a tight seal. Drill and tap the
Fig. 2 Oil Cooler Core Prepared for Pressure Check
plate to permit an air hose fitting to be attached at the
inlet side of the oil cooler core (Fig. 2).
CAUTION:
In cases where a leaking oil cooler core has caused
2.
Attach an air hose and apply 75-150 psi (517-1
contamination of the engine, the engine must be
034 kPa) air pressure. Then, submerge the oil cooler
flushed immediately to prevent serious damage
core and plate assembly in a tank of heated water
(refer to Chapter 6).
(180 or 82 ). Any leaks will be indicated by air
F
C
bubbles in the water.
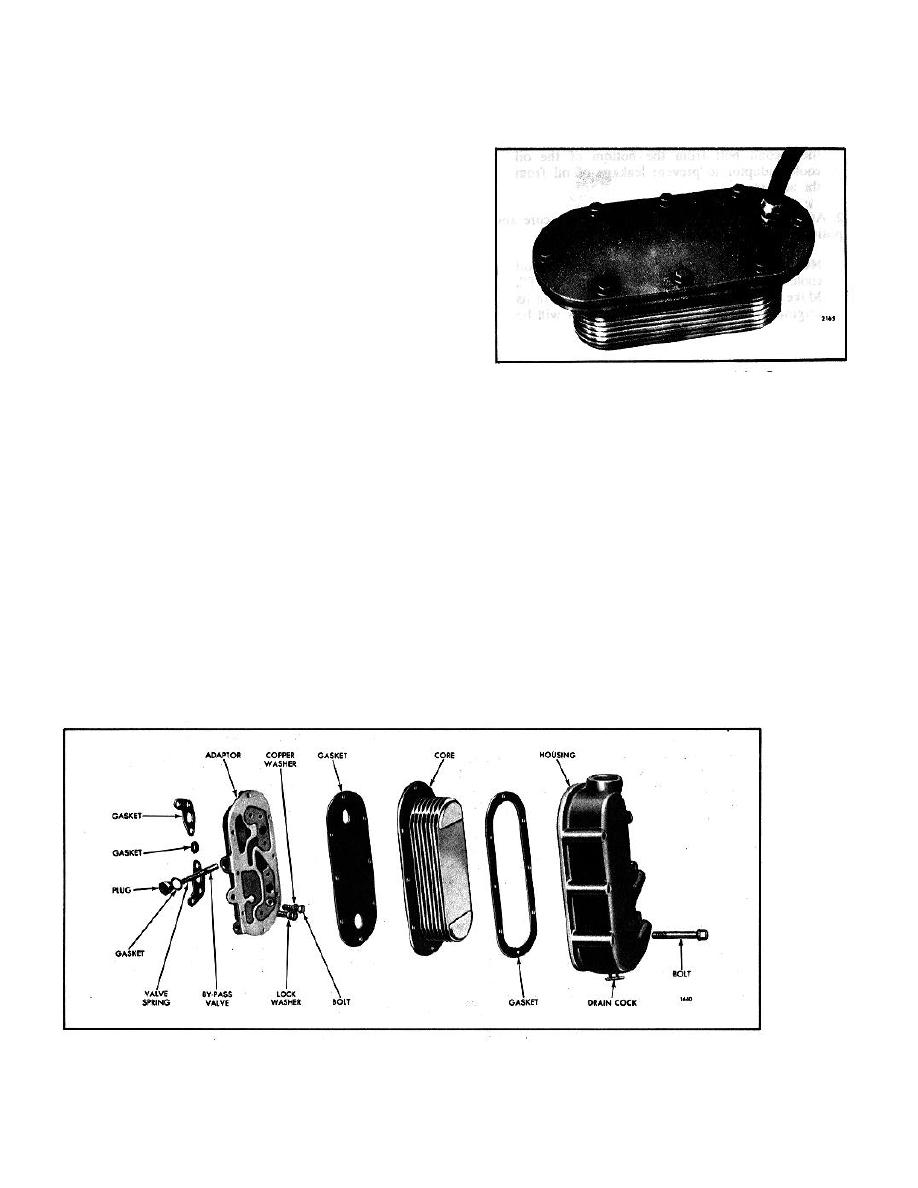
Install Lubricating Oil Cooler
WARNING
Refer to Fig. 3 and install the lubricating oil cooler as
When making this pressure test be sure that
follows:
personnel are adequately protected against any
stream of pressurized water from a leak or rupture
1.
If the oil cooler adaptor was removed from the
of a fitting, hose or the oil cooler core.
cylinder block, remove the old gaskets from the bosses
where the adaptor sets against the block. Affix new
3.
After the pressure check is completed, remove
adaptor to cylinder block gaskets; then secure the
the plate and air hose and dry the oil cooler core with
adaptor to the cylinder block with bolts, lock washers
and copper washer.
10-5-17
