TM 5-3895-359-14&P
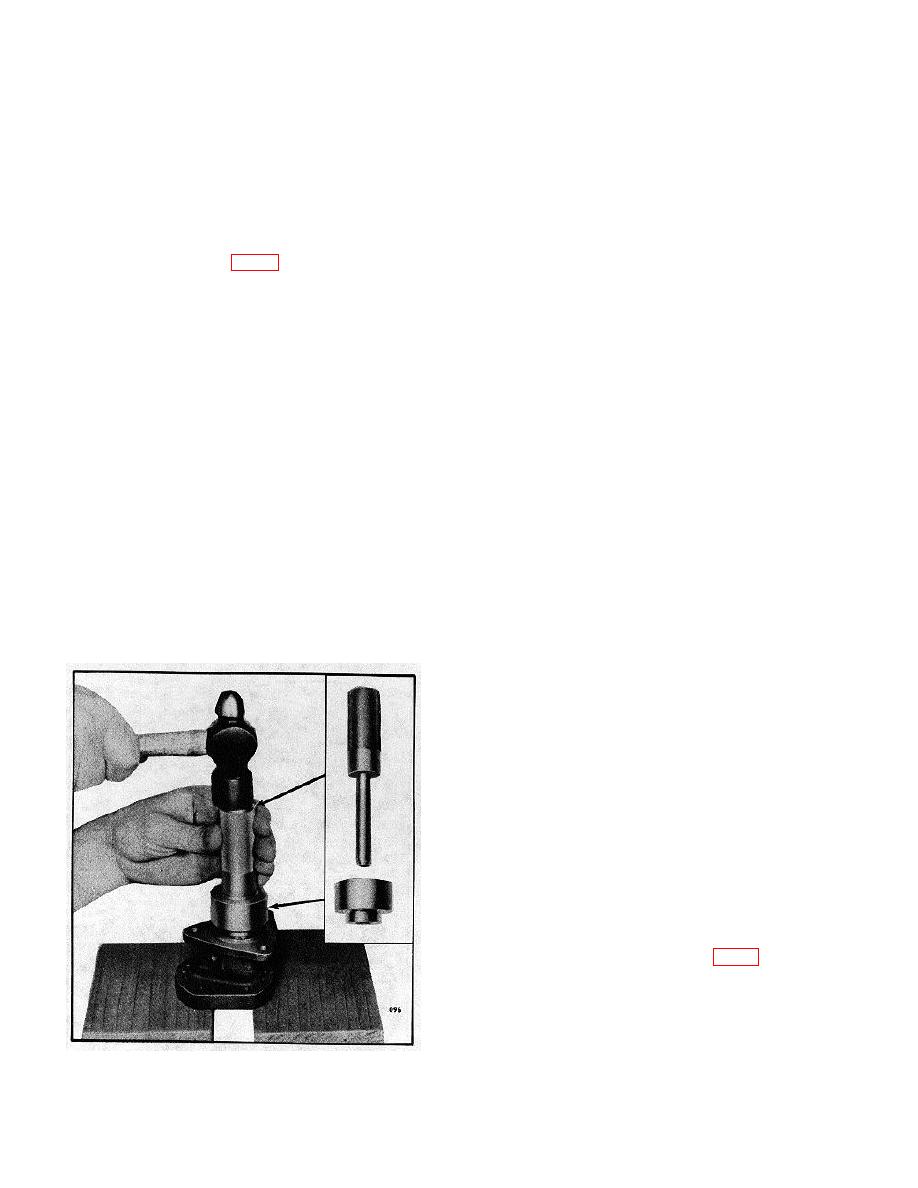
the pump body so the seal starts straight into the pump
4. Lubricate the pump shaft and insert the square end
flange. Then drive the seal in until it bottoms.
of the shaft into the opening at the gear side of the
pump body and through the oil seals as shown in Fig.
c. Place the shorter end of the adaptor J 1508-9
10.
over the pilot and against the shoulder of the
5. Place the driven shaft and gear assembly in the
installer handle. Place the outer oil seal on the
pump body.
pilot of the installer handle with the lip of the
seal facing the adaptor. Then insert the pilot of
NOTE: The driven gear must be centered on the shaft
the installer handle into the pump body and
to give proper end clearance. Also, the chamfered end
drive the seal in (Fig. 9) until the shoulder of
of the gear teeth of the production gear must face the
the adaptor contacts the pump body. Thus the
pump body. If a service replacement gear with a slot is
oil seals will be positioned so that the space
used, the slot must face toward the pump cover.
between them will correspond with the drain
holes located in the bottom of the pump body.
6. Lubricate the gears and shafts with clean engine oil.
2. Clamp the pump body in a bench vise (equipped with
7. Apply a thin coat of quality sealant on the face of the
soft jaws) with the valve cavity up. Lubricate the outside
pump cover outside of the gear pocket area. Then
diameter of the valve and place it in the cavity with the
place the cover against the pump body with the two
hollow end up. Insert the spring inside of the valve and
dowel pins in the cover entering the holes in the pump
the pin inside of the spring. With a new gasket in place
body. The cover can be installed in only one position
next to the head of the valve plug, place the plug over
over the two shafts.
the spring and thread it into the pump body. Tighten the
1/2"-20 plug to 18-22 lb-ft (24-30 Nm) torque.
NOTE: The coating of sealant must be extremely thin
since the pump clearances have been set up on the
3. Install the fuel pump drive gear over the end of the
basis of metal-to-metal contact. Too much sealant
drive shaft which is not squared (so the slot in the gear
could increase the clearances and affect the efficiency
will face the plain end of the shaft). This operation is
of the pump. Use care that sealant is not squeezed into
very important, otherwise fine score marks caused by
the gear compartment, otherwise damage to the gears
pressing the gear into position from the square end of
and shafts may result.
the shaft may cause rapid wear of the oil seals. Press
the gear beyond the gear retaining ball detent. Then
8. Secure the cover in place with eight bolts and lock
place the ball in the detent and press the gear back until
washers, tightening the bolts alternately and evenly.
the end of the slot contacts the ball.
9. After assembly, rotate the pump shaft by hand to
make certain that the parts rotate freely. If the shaft
does not rotate freely, attempt to free it by tapping a
corner of the pump.
10. Install 1/8" pipe plugs in the upper unused drain
holes.
11. If the pump is not to be installed immediately, place
plastic shipping plugs in the inlet and outlet openings to
prevent dirt or other foreign material from entering the
pump.
Install Fuel Pump
The pump must always be installed with the inlet
opening in the pump cover (marked "RH IN") on the side
toward the cylinder block. Note in Fig. 2 that the
Fig. 9 - Installing Outer Oil Seal
10-3-34


