TM 5-3895-359-14&P
SHOP NOTES - TROUBLE SHOOTING
SPECIFICATIONS - SERVICE TOOLS
SHOP NOTES
TEFLON WRAPPED PIPE PLUG
2.
Start the tape one or two threads from the small or
Pipe plugs with a baked teflon coating are available for
leading edge of the plug, joining the tape together with
service. However, pipe plugs can be hand wrapped
an overlap of approximately 1/8"
satisfactorily with teflon tape to provide a better seal and
facilitate plug removal. When a teflon wrapped plug is
3.
Wrap the tape tightly in the same direction as you
installed, it is extremely important that the specified
would turn a nut. The tape must conform to the
torque not be exceeded.
configuration of the threads (be pressed into the minor
diameter of the threads) without cutting or ripping the
Hand wrap a pipe plug with teflon tape as follows:
tape.
1.
Be sure the pipe plug is thoroughly clean and dry
4.
Hand tighten and hand torque the pipe plug and
prior to applying the teflon tape. All dirt, grease, oil and
do not exceed the specified torque. Do not use power
scale must be removed.
tools.
CHECKING BEARING CLEARANCES
The plastic strip may be used for checking the bearing
clearances as follows:
1.
Remove the bearing cap and wipe the oil from the
bearing shell and the crankshaft journal.
NOTE:
When checking the main
bearing clearances with the engine in
a position where the main bearing
caps are supporting the weight of the
crankshaft and the flywheel, an
erroneous reading, due to the weight
of the crankshaft and flywheel, can
be eliminated by supporting the
weight of the crankshaft with a jack
under the counterweight adjoining
the bearing being checked.
2.
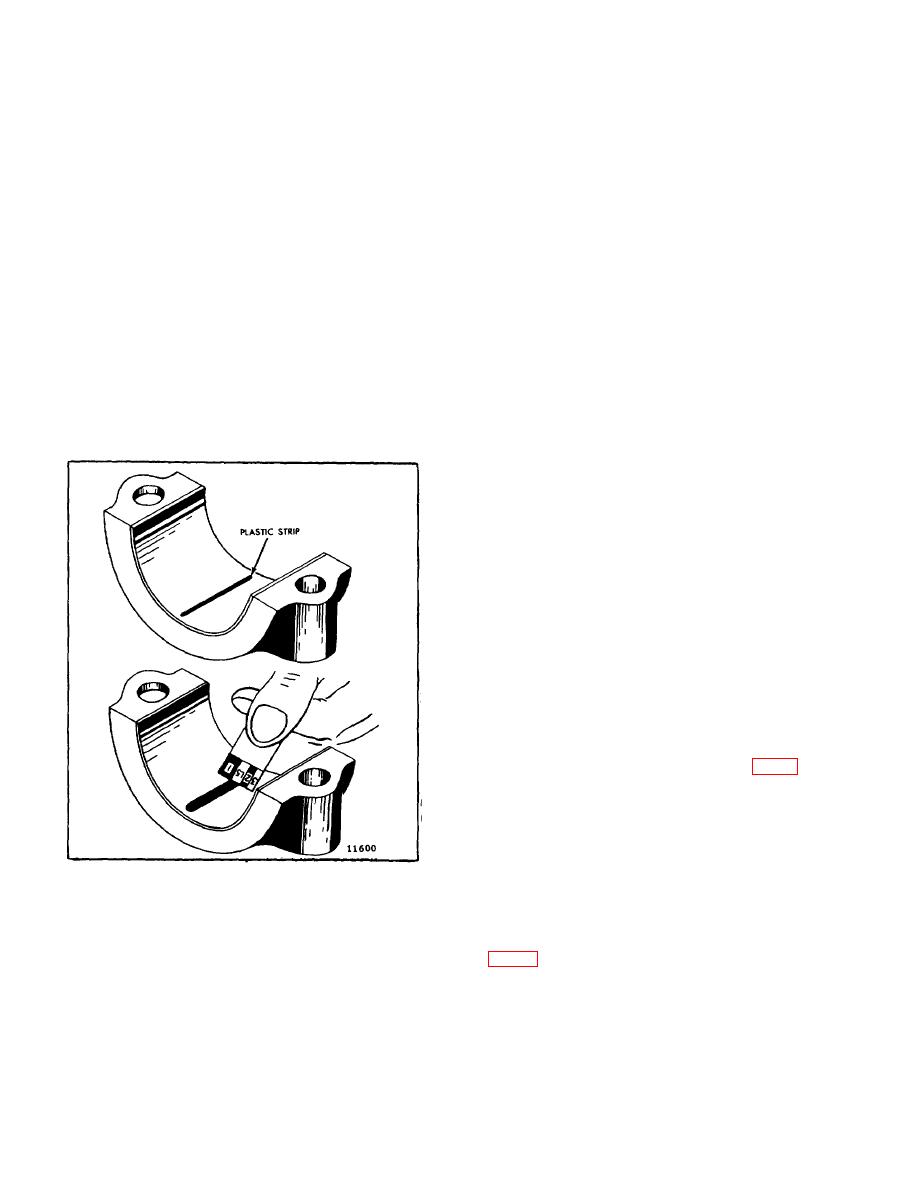
Place a piece of the plastic strip the full width of
the bearing shell, about 1/4" off center (Fig. 1).
3.
Rotate the crankshaft about 30 from bottom dead
center and reinstall the bearing cap. Tighten the bolts to
the specified torque.
4.
Remove the bearing cap. The flattened plastic
Fig. 1. Using Plastic Strip to Measure Bearing-to-
strip will be found adhering to either the bearing shell or
Crankshaft Clearance
the crankshaft.
A strip of soft plastic squeezed between the crankshaft
5.
Compare the width of the flattened plastic strip at
journal and the connecting rod bearing or main bearing
its widest point with the graduations on the envelope
may be used to measure the bearing clearances.
The strip is a specially molded plastic "wire"
envelope indicates the bearing clearance in thousandths
manufactured commercially and is available in three
of an inch. Taper may be indicated when one end of the
sizes and colors. Type PG-1 (green) has a clearance
flattened plastic strip is wider than the other. Measure
range of .001" to .003", type PR-1 (red) has a range of
each end of the plastic; the difference between the
.002" to .006" and type PB-1 (blue) has a range of .004"
readings is the approximate amount of taper.
to .009".
10-2-131


