
TM 5-3895-359-14&P
Lubricating oil and oil filters should be changed
periodically to avoid the accumulation of sludge.
Valve sticking may also result from valve stems which
have been scored due to foreign matter in the
lubricating oil. leakage of antifreeze (glycol) into the
lubricating oil which forms a soft sticky carbon and gums
the valve stems, and bent or worn valve guides.
Sticking valves may eventually be struck by the piston
and become bent or broken.
It is highly important that injector timing and valve
clearance be accurately adjusted and checked
periodically.
Improperly timed injectors or tightly
adjusted valves will have adverse effects upon
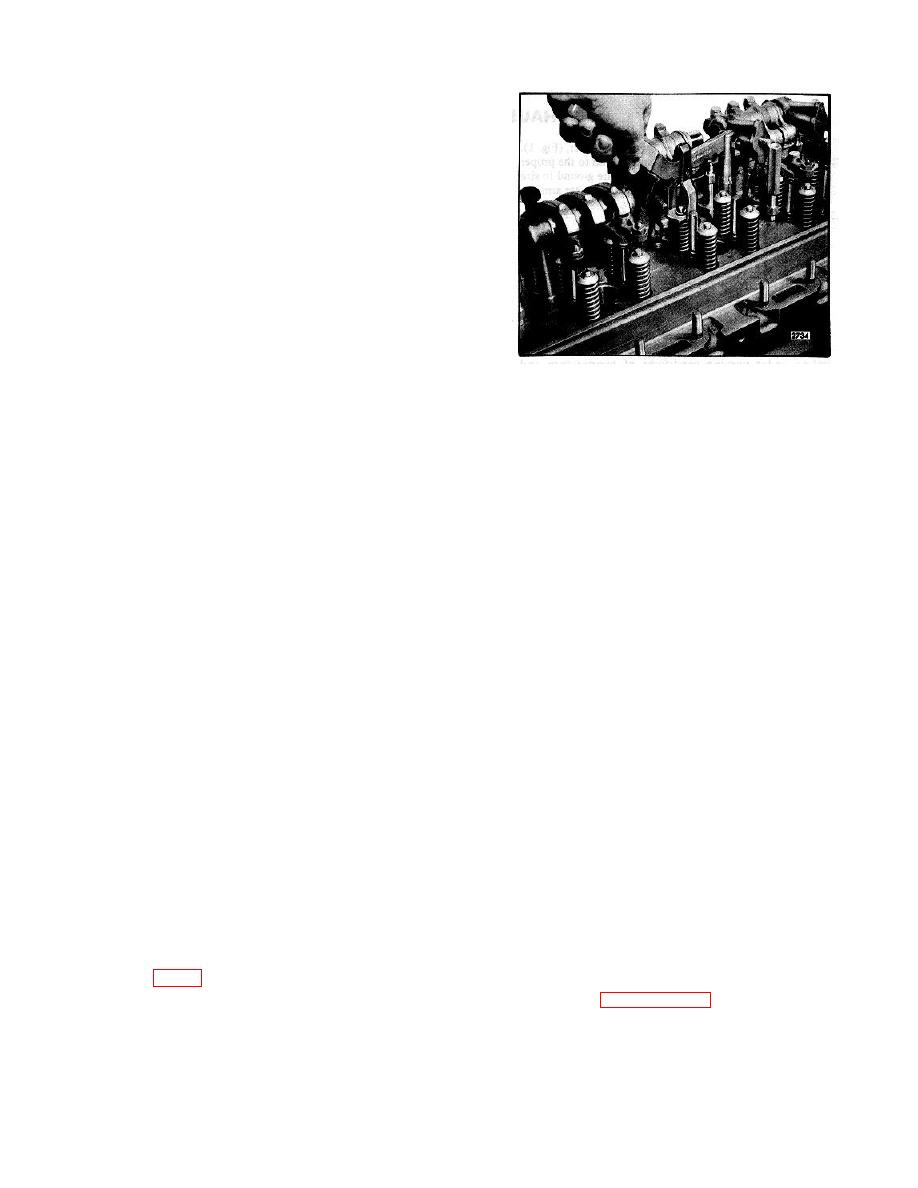
Fig. 3. Removing Exhaust Valve Spring (Four-Valve
Remove Exhaust Valve Spring (Cylinder Head
Head Shown) using Tool J 7455
Installed)
Remove Exhaust Valves
and
Valve
Springs
An exhaust valve spring may be removed, without
(Cylinder Head Removed)
removing the cylinder head from the engine, as follows:
With the cylinder head removed from the engine,
1. Clean and remove the valve rocker cover.
remove the exhaust valves and springs as follows:
2. Crank the engine over to bring the valve and injector
1. Support the cylinder head on 2 " thick wood blocks to
rocker arms in line horizontally.
keep the cam followers clear of the bench.
NOTE: When using a wrench on the
2. Remove the fuel pipes from the injectors and the fuel
crankshaft bolt at the front of the
connectors.
engine, do not turn the crankshaft in a
left-hand direction of rotation or the bolt
NOTE: Immediately after removing the
may loosen.
fuel pipes, cover each injector opening
with a shipping cap to prevent dirt or
3. Disconnect and remove the fuel pipes from the
other foreign matter from entering the
injector and the fuel connectors.
injector.
NOTE: Immediately after removing the
3. Remove the two bolts holding the rocker arm shaft
fuel pipes, cover each injector opening
brackets to the cylinder head.
Then remove the
with a shipping cap to prevent dirt or
brackets and the shaft.
other foreign matter from entering the
injector.
4. Remove the fuel injectors.
4. Remove the two bolts holding the rocker arm shaft
5. Place a block of wood under the cylinder head to
brackets to the cylinder head.
Then remove the
support the exhaust valves. Remove the exhaust valve
brackets and shaft.
springs as outlined in Steps 6 and 7 above.
5. Remove the cylinder block air box cover so that
6. Turn the cylinder head over, using care to keep the
piston travel may be observed, then turn the
valves from falling out of the head. If the valves are to
crankshaft until the piston is at the top of its stroke.
be reused, number each valve to facilitate reinstallation
in the same location. Then withdraw the valves from
6. Thread the valve spring compressor adaptor J 74557
the cylinder head.
into one of the rocker arm bracket bolt holes in the
cylinder head (Fig. 3). Then compress the valve spring
7. Remove the cam followers and push rod assemblies
and remove the two-piece tapered valve lock.
as outlined on Page 10-2-31 under Remove Cam
Follower and Push Rod Assembly (Cylinder Head
7. Release the tool and remove the valve spring cap,
Removed from Engine).
valve spring and spring seat.
10-2-38
