
TM 5-3895-359-14&P
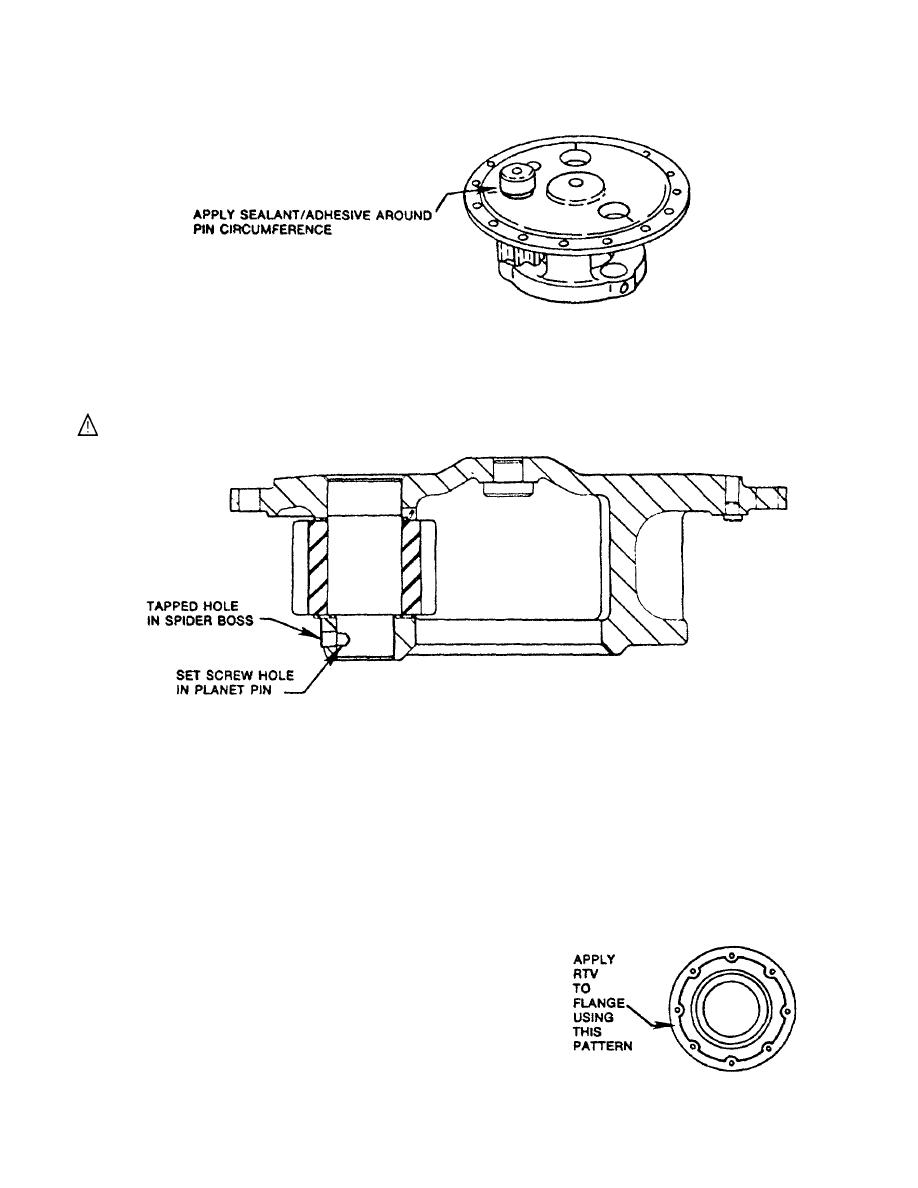
F. Brush Loctite 271 (Rockwell Part No. 11990B-3720) sealant/adhesive on the planet pin O.D. protruding from the
cover.
G. Being careful to keep match marks aligned, press the planet pin into the spider until the shoulder of the pin
bottoms against the Inner thrust washer.
NOTE: It a press Is not available use a brass drift and mallet to tap the pin through the spider and planet gear.
WARNING: Do not strike planet pins directly with a steel hammer as eye injury or damage to parts
could result.
H. Install set screw Into spider and planet pin. New set screws, if used, have pre-applied locking agent on the
threads. If original set screws are used, apply one or two drops of Loctite 277 (Rockwell Part No. 2297-C-3747)
to threads of spider before installing. Tighten set screw to 15-25 lb. ft. torque.
I. Repeat the reassembly procedures to install the second and third sets of pins, washers and gears.
INSTALL PLANETARY SPIDER ASSEMBLY
A. Apply a bead of silicone RTV gasket material (approximately 3/32' diameter) to the mounting flange of the
planetary spider.
NOTE: Where silicone RTV gasket material is used, Dow Silastic No. RTV-732 Black and General Electric No.
RTV-1473 Black meet our requirement. However, silicone RTV is also available in bulk under Rockwell Part No.
1199-Q-2911; In 10 OL tubes, part number 1250-X-388; or in 3 oz. tubes, part number 1199-T-3842
The bead of RTV gasket material must always be
around the Inner side of the flange holes (between holes
and spider pilots The spider assembly must be Installed
in hub within 30 minutes of liquid gasket application.
5-7
