
TM 5-3895-359-14&P
H.
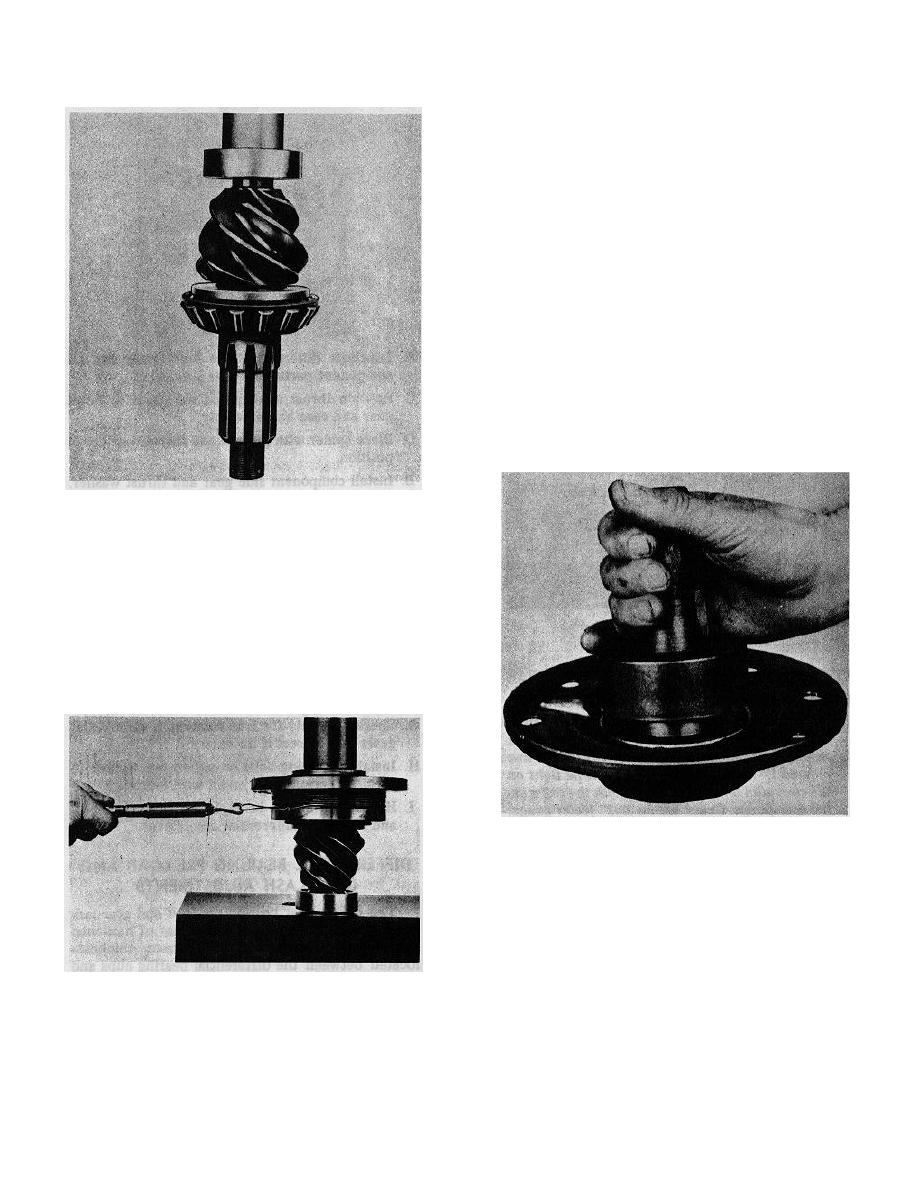
While in press at 25,000 pounds pressure, check
bearing pre-load torque. Wrap soft wire around
cage and pull on horizontal line with pound scale. If
a press is not available, the yoke may be installed
and the pinion nut tightened to specified torque for
checking.
If rotating torque is not within 5 to 15 pound-
inches, use thinner spacer to increase or thicker spacer
to decrease pre-load.
Example: Assuming pinion cage diameter to be 6
inches the radius would be 3 inches and with 5 pounds
pull would equal 15 pound-inches pre-load torque.
I. Press yoke against forward bearing and install washer
and pinion shaft nut.
J. Place pinion and cage assembly over carrier studs,
hold yoke and tighten pinion shaft nut to specified
torque. The yoke must be held with a suitable tool
or fixture to tighten nut.
K. Recheck pinion bearing pre-load torque. If rotating
torque is not within 5 to 15 pound-inches, repeat the
foregoing procedure.
L. Hold yoke and remove pinion shaft nut and yoke.
A. Press rear thrust and radial bearings firmly against
the pinion shoulders with a suitable sleeve.
B. Install radial bearing lock ring and squeeze ring into
pinion shaft groove with pliers.
C. If new cups are to be installed, press firmly against
pinion bearing cage shoulders.
D. Lubricate bearings and cups with light machine oil.
E. Insert pinion and bearing assembly in pinion cage
and position spacer or spacer combination over
pinion shaft.
F. Press front bearing firmly against spacer.
G. Rotate cage several revolutions to assure normal
bearing contact.
M. Lubricate pinion shaft oil seal and cover outer edge
of seal body with a non-hardening sealing
compound. Press seal against cover shoulder with
seal driver.
N. Install new gasket and bearing cover.
4-17
